BOB Ibex Trailer – First Impressions

For those interested in cycle touring, and by that I mean self supported rather than guided with luggage portage, there is the question of how to transport all your stuff around with you. If you are camping either wild or in campsites space on the bike needs to be found for  equipment which can become a bit of a packing nightmare; tents, sleeping bags, food, stoves, cameara etc all need a home.

The default approach for most riders has always been panniers, however there is another option available in the form of trailers which offer an alternative and possibly more flexible approach.

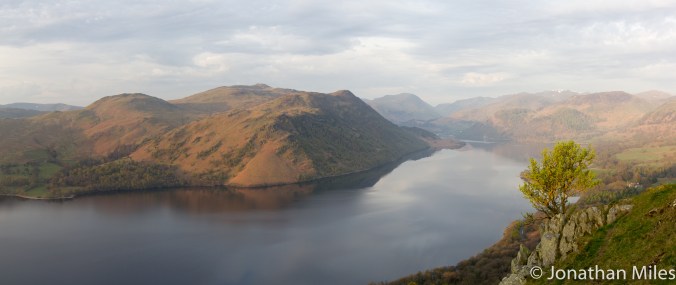
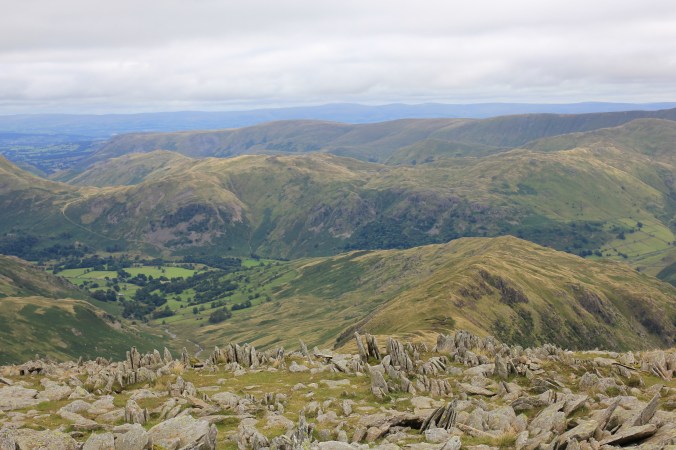
I have just returned from just under a week of cycle touring round the islands of Coll, Tiree, and Barra off the north west coast of Scotland. It was also my first trip with my new BOB Ibex trailer and an ideal first test of the kit. I have some previous with BOB trailers as I rented the more basic Yak model in 2012 when I went cycle touring in Iceland, and was at that point sold on getting one for trips in the UK.
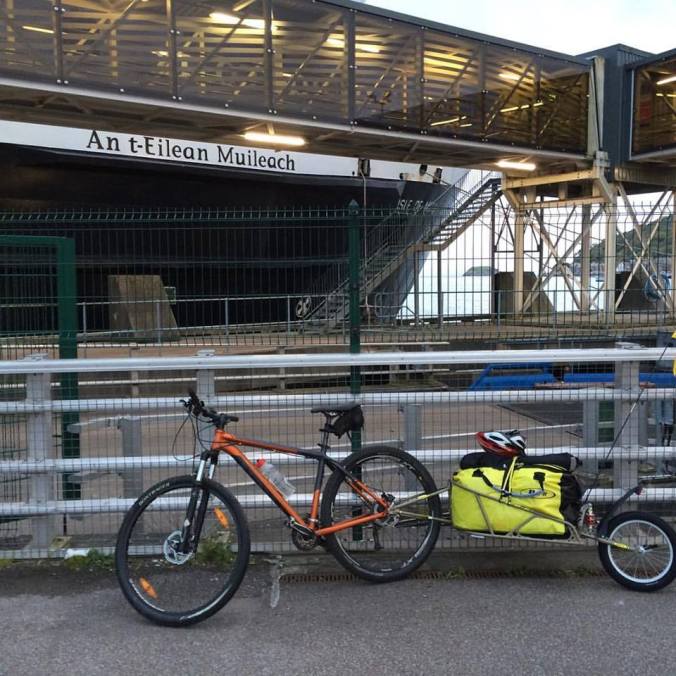
14054119_10100355473417459_4559221144409316378_n

Ready for the ferry

Version and Set Up

Although BOB still make the Yak I went for their newer Ibex model which includes a suspension fork on the trailer wheel. Although my experience of the Yak in Iceland was good It did bounce notably when dropping off curbs etc. and I intend to take this trailer onto rougher terrain in the UK including single track and therefore thought some rear cushioning would be useful. I also bought the bigger version compatible with 29 inch mountain bike wheels, as my 29er is mainly the bike I intend to tow it with (this larger version is also compatible with 700C road wheels). A smaller 26 inch wheel version is also available but the bigger version works with 26 inch wheels too.

Setting up was very easy (detailed instructions) straight out of the box; the swing arm,  and shock/wheel assembly need attaching to the main load area which can be done with a few simple tools (adjustable and torque wrench).  Both models attach to the rear wheel of the bike through a modified quick release mechanism (through axel users, word on the street these are now available with through axels for fat bikes), the trailer drops into grooves within the QR and is held in place using locking pins. With the trailer removed the QR functions as normal so you don’t need to carry the original around with you if you decide to ditch the trailer for a day.

IMG_1800

Attachment point and locking pin on rear hub

Storage

The trailer comes with a massive (94 litre) yellow and black waterproof bag, which swallows large amounts of kit. The material feels really durable and well made, and closes with a simple fold and clip shut mechanism. Having only a small tent with me I used the bag as overnight storage outside by tent and it showed no sign of leaking despite two nights of heavy rain.

One of the benefits of the trailer is in my opinion is storage, although it is possible to match the Ibex storage volume using panniers based on the average pannier being 20-25 litres you would need front and rear wheel mounts and therefore a proper touring bike to get close. The large single volume also means you don’t need to break things down to get them to fit, so no more splitting the tent into three pieces! The trailer is rated to carry up to 32kg which should be more than enough for anyone; crucially as outlined below the weight is much less noticeable with a trailer as the wheel means it is not all taken through the bike.

Handling

Obviously you do notice the weight on the bike especially when you are getting going but I think it is less noticeable than with panniers; the trailer keeps the centre of mass lower and because it has its own wheel only puts some of the carried weight through the bike; because of this, and also the flexibility of the swing arm I think the bike feels less encumbered and more stable and manoeuvrable.

Although I did not really test the trailer on really difficult ground during this trip (mainly worn  tarmac, gravel tracks, sandy beach, and grass), a number of points were apparent, the ride was very smooth even on rougher terrain, the suspension gives a ride that is certainly smoother than the Yak with no bounce going up and down curbs. The single wheel design means the trailer tracks very accurately behind the bike even when you are winding about all over the place. The short clip below gives an idea of how well the trailer tracks.

Hills

Going up hills with the trailer was fine too, I tackled a number of hills with gradients up to about 15% no problem; granted you can’t power your way up them in the big ring but need to sit and tick over but you really would not know there was that much weight hanging off the back wheel. For those that like to ride up steep sections out the saddle I did notice significant and disconcerting wobble of the rear with a very heavy (>20kg) load. This went away as soon as I sat down again and was not present with more moderate loading of the trailer.

Parking

This is not normally an issue with a bike, but it is with a BOB especially if its heavily loaded. The trailer will very easily fall on its side if you are not careful how you park it against an object and in doing so it will take your bike with it. The Yak I used in Iceland did have a stand but I remember that not working to well. Just paying a bit more attention to how you leave the bike and you should be fine.
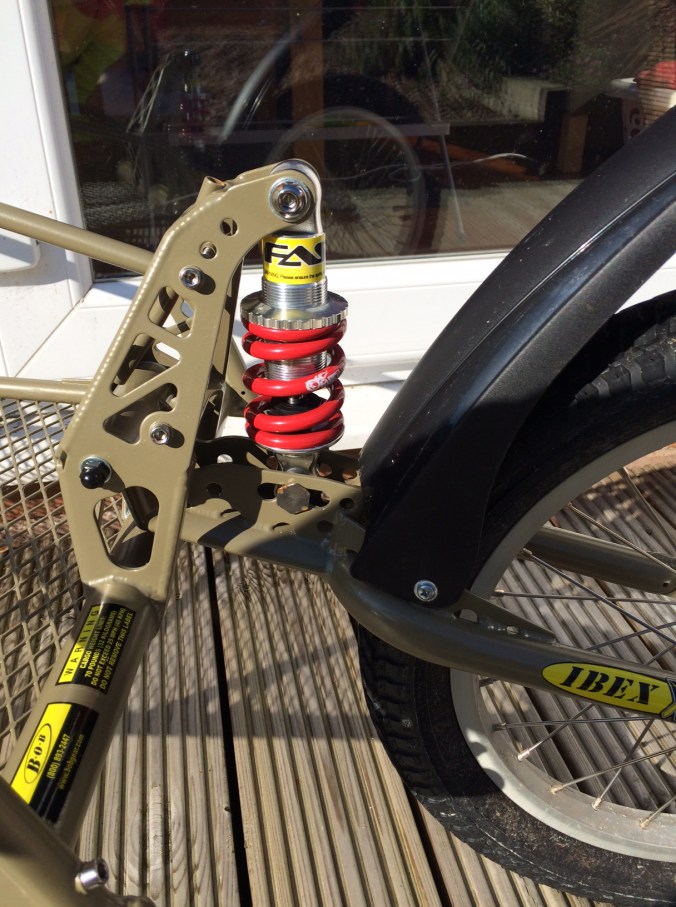
IMG_1801

Trailer shock

Currently planning on giving the trailer a second test on the Pennine Bridleway in October, so will report back!

Advertisement

First Packrafting Lessons

CampingLast weekend I made my first attempt at packrafting, taking a cheap and cheerful trip down Ullswater in the Lake District. I found the trip more difficult than expected, partly because of the weather and partly because it was a new adventure and I only 1/2 knew what I was doing! here are a few things I learned for next time.

  1. Spraydecks are useful – Like on a kayak spraydecks are covers that seal between your waist and the raft and prevent splashes and drips getting into the craft. Being in a £30 dinghy rather than a proper raft I did not have one and had to stop every hour or so to bail the inch or so of accumulated water out the boat.
  2. Gloves are good – Your hands will get wet from the paddles; I ended up with small blisters on both hand from the rubbing of wet skin, a pair of neoprene type gloves will not only prevent this but keep your hands warm too!
  3. Footwear is better- I paddled with a pair of approach shoes for the walking section stored self in a dry bag but did not think to bring anything to paddle in. Que. cold wet feet, and sharp pointy rocks. I had a pair of kayaking shoes at home and wished I had brought them
  4. Balance your boat- Spend some time setting up your raft get everything in balance and a comfortable sitting position paddling around the launch point before you set off, don’t get over excited to be away and then have to try and do this later when you get pins and needles in the middle of the lake.
  5. Protect your air valves – If like me you start with a basic dinghy the inflation valves may be simple and in a position where they can be easily knocked. I managed to accidentally dislodge the valve for the floor chamber shifting my rucksack in the boat. Fortunately this was the least crucial of the chambers and I was easily able to reach shore and re-inflate. At the end of the day removing my bag from the raft the inner ring chamber accidentally deflated, that would not have not have been good mid-lake. I can’t speck for the valves on expensive rafts but in future I will cover mine after inflation with some gaff tape to protect them from movement in the boat.
  6. Trying to film in a raft is a right faf – No solution yet, it just is!
  7. If its windy take the kayak – Although this limits the whole walking bit.

Alastair Humphreys has some further tips, I should have paid more attention when I read this the fist time.

I should also add.

  1. Its great fun
  2. A post paddle swim is mandatory!
  3. Research your rivers beforehand if possible, UKriversguidebook is good for this
  4. You need a buoyancy aid, yes you do.

A First Packrafting Trip

“Believe me, my young friend, there is nothing – absolutely nothing – half so much worth doing as simply messing about in boats.” These words from Rat to Mole in the Wind in the Willows, invoke the joys, beauty and adventure of days on the water, invoking motifs and memories, the gentle rocking of the boat, sunlight glinting off the water, or the long branches of the weeping willow swaying lazily in the breeze.

The Edwardian idle of Ratty and Mole lounging on a riverbank may never have existed even when the words were set to paper; indeed as my packraft lurches over yet another wave the Wind in the Willow-esque dream I had imagined for todays tip on water could not be much further from the reality.

So why did I find myself in the middle of a boisterous Ullswater lake in what, wishful thinking on my part would describe as a packraft, but in reality could be more accurately described as a dinghy!

So to rewind, the idea for this trip had grown out of various ideas to have an adventure that allowed me to see the Lake District from a new angle, away from the crowds, and also with a real feeling of pushing myself to try something new. So with maps spread out on the floor at home my finger trying to trace rivers, lakes, and tracks I came up with the plan; a traverse north to south down the length of Ullswater and Windermere with a wild camp on the hills hiking in between the two sections of paddling. I had visions of lazy summers days on the lakes, exploring the islands which dot their surface, a proper adventure.

I’ve owned a kayak for many years, but its a big lump of plastic that is the antithesis of the words light and flexible, I really struggled to see how I could use it in a practical way, and certainly did not want to carry it over any hills! Fortunately new outdoor toys are appearing to fill problematic niches such as this, what I needed was a packraft.

Small inflatable boats, packrafts are a long way from kayaks; virtually the only similarity they share is they work on water and you move them about with a paddle. The first packfrafts originated to help troops cross rivers in the mid 20th century, but the boats we know today really came out of Alsaka much more recently. Developed to help people move through the mountain and dense forest that makes up much of the state; they are light enough to be carried in a rucksack but durable and sturdy enough to run the white water.

It seemed the perfect solution, supreme flexibility of movement, easily capable of taking a person, sack, and even a bike over river and lake, quickly linking together points on a map that would otherwise be a challenge. For Scotland, Scandenavia, indeed anyplace that is a land rich in water they look great, I knew I wanted one, and then I saw the price and knew I had a problem!

Lakes (2 of 2)

A Still Looking Ullswater at Dawn

So this is why I’m currently paddling along the length of Ullswater in a £30 dinghy rather than a £1,000 packraft; as this first trip is on flat water and I’ve convinced myself I’ve no need for a white water capable craft, which is good as currently neither does my bank balance.

The weather dealt the first blow to my well laid plans, the forecast was for a dry still weekend but unfortunately the high pressure system bringing these benign conditions must have been delayed, because when I launched from Pooley Bridge on Saturday I found myself paddling into a headwind strong enough to cause the yachts on the lake to slew round their moorings, their flags and pennants streaming out in the breeze.

I had chosen to paddle within 30 or so meters of the bank just in case I had an issue with the raft and needed to beach it quickly! I lashed my rucksack to the grab-line round the craft to prevent any accidental offerings to the lake and further stuffed it with two inflated airbags  taken from my kayak just in case.

In the teeth of the wind any forward movement was heavy work and progress felt hard won, staring at the bank I would watch as I ever so slowly caught and overhauled trees and rocks, after about two hours I pulled into the bank for a rest and made the dispiriting discovery I had covered only about two kilometres.

Ullswater looks very different on the lake itself, from the banks you only see one aspect, a neat perspective of the water and shore leading the eye out into the lake. From high in the the hills you get a different view, how the lake fits in the landscape, the curve of the bays, and bumps and spurs of promontories or dog legs. From the middle of the lake the biggest feeling from the landscape is a sence of space, stretching out in all directions, distances become hard to judge as promontories overlap with each other foreshortening perspectives. The shape of the lake is also hidden, bays and even the large dog leg half way down the lake only revealing themselves at the last moment sliding into view from behind hills and trees.

IMG_7120

£30 of High Performance Packraft

At about the half way point I had to be bold, to reach my campsite I needed to cross the lake, moving out from the safety of the shore over about 600m of open water which at my current pace could take me at least three quarters of an hour. In still air this would have been fine, but the windy conditions had whipped the waters out from shore in to a decent swell which the though of battling far from the safety of the bank I found unsettling.

With my pulse slightly raised I concentrated on paddling efficiently with good strokes on both sides to make progress as quick as possible, attention focused on a rocky buttress on the far side of the lake. Once out of the protection of the shore the wind seamed to pick up and the waves increase, I had to take them head on but the raft coped better than I had expected although I did ship a bit of water from splashes that required bailing out (proper packrafts come with spraydecks). When I reached the far side I landed on a tiny beach for an obligatory large mug of Yorkshire Tea and biscuits feeling particularly heroic!

After six hours of hard work and having covered a mere 10km I arrived on the small beach at Silver Bay, I had spotted the location earlier in the year and marked it out as an excellent camping spot, a thin strip of grass lying between the gravel and thick bracken. The paddling had been so hard but also very rewarding, I felt I had made a real effort to make those 10K and managed to deal with what the weather had thrown at me. I did however realise I had bitten off more than I could chew for a first trip and I had made the decision paddling Windermere tomorrow was not on the cards .

By the time the tent was up (and more tea brewed!) the wind had begun to drop, leaving just a few ripples on the surface of the lake and a beautifully still evening as the last few boats headed in to their morings for the night. Although Ullswater is a busy lake Silver Bay feels secluded and I was able to go for a cheeky, if also slightly chilly wild swim au-naturel without the fear of being overlooked.

Camping

Camping at Silver Bay

Settled conditions had certainly arrived by Sunday as I took the tent down in the still morning air. Raft deflated and packed, buoyancy aid stowed, and paddle disassembled it was time to validate the first half of the packraft concept. Proper rafts weigh about 2.2kg, obviously for £30 mine weighed about half as much again but my pack was not uncomfortably heavy and certainly manageable for multi-day trips.

My walking route took me up Heart Fell by the Hartsop ridge, the original plan, now discarded in favour of a more sane option had been to descend from here to Ambleside and paddle the length of Windermere. Instead I now followed the ridge line round to Red Screes before descending down to the Kirkstone pass and a well deserved beer before catching the bus back to Pooley Bridge.

I will certainly return to packrafting although probably in something a little more rugged next time. There is a lot of possibility for real adventures, new approaches to the hills such as Slioch across Loch Maree, or the Munros down Loch Etive in Scotland; even in busy England its a great way to explore the Lakes, the Broads, or the Thames; for those with white water skills they offer even more flexibility. Just being on the water makes any trip to the hills a little bit more adventurous, because deep down we all think a little bit like the Mole.

“Never in his life had he seen a river before—this sleek, sinuous, full-bodied animal, chasing and chuckling, gripping things with a gurgle and leaving them with a laugh, to fling itself on fresh playmates that shook themselves free, and were caught and held again. All was a-shake and a-shiver—glints and gleams and sparkles, rustle and swirl, chatter and bubble. The Mole was bewitched, entranced, fascinated.”

Heartsop

Looking Down Hartsop on How from Heart Fell

NorthYork Moors Microadventure

Last weekend I went out to photograph some of the waterfalls on the North Yorkshire Moors; wanting to visit and explore Whitby and the coast the following day I slept below Captian Cook’s Monument which offers a great view west along the northern edge of the moors as they drop steeply into the plain of the Tees Valley.

The location is also a good spot for a picture of Roseberry Topping, an iconic little hill of the north and to my mind a min Stac Polly.  Currently the sun sets just behind the hill giving a lovely if commonly used composition. Arriving with the light failing and not knowing the location I did not find a good set up for the shot and did not feel like gatecrashing another photographer who had, instead I captured an image looking over the valley as the sun lit up the clouds a spectacular yellow and gold.

The following morning I did dial the best shooting locations for my next visit before heading to Whitby. I had wanted to visit Black Nab, another very commonly shot location but the tides were wrong so contented myself with some long exposures of the breakwater.

Cook (3 of 3)

Roseberry Topping

Cook (1 of 3)

Sunset

Cook (2 of 3)

Morning view

whitby (1 of 1)

Whitby southern breakwater

Waterfalls of the North Yorkshire Moors

I spent the weekend seeking out a few of the waterfalls on the moors for a project where I will return throughout the year to record images throughout the seasons looking for the changes in character of the falls.

I managed to get to three locations and confirmed earlier findings in the Dales that photographing waterfalls usually involves clambering down steep slopes, over rocks and through rivers. My kayaking shoes proved very useful for both grip and set up in the middle of the stream!

I took my Big Stopper but being summer the greenery is lush at the moment casting a lot of shade and I only needed it at Thomason Force.

Mallayn Spout (1 of 1)

Mallyan Spout

Thormason Force (1 of 1)

Thormason Force

Falling Foss (2 of 1)

Falling Foss

Falling Foss (1 of 1)

Falling Foss